Woodworking on Furniture - Shelf Completed! - 20250618
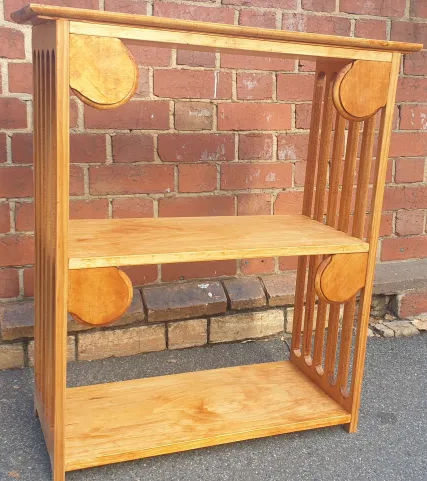
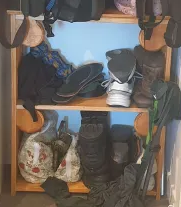
I can't believe I started this piece THREE MONTHS AGO! That was an extremely long time. Admittedly I did have to pause this for a few weeks in the middle there to make some set pieces for a play, but wow that time just flew by. I remember the whole time I was making this I was looking into my messy wardrobe thinking "soon, soon this will all be stacked properly...". and now...
There are a few things that I ended up cutting for time. Turns out the PVA wood glue I used was so strong that it really holds the whole thing together without any wobbling, and so I didn't feel the need to secure the back with MDF. Now that I know that, if I made this thing again I would have absolutely added the decorative stabilisers to the other side. Wood glue really is amazing. Additionally, I originally wanted a carved decoration on those stabilisers, maybe done with a local CNC router, but I ended up cutting that idea for time (because I'd have to remake the whole shape from scratch cuz they can only CNC square pieces).
Other than that I think this thing holds up (literally lol) as a piece. Its certainly a bit amateur in some ways. The staining isn't totally even and there's a few glaring issues where measurements were wrong and it doesn't like up perfectly around the shelf edges and sides (I think this is minor issues caused by me missing the mark by a few mm when drilling holes) but overall I am very proud of myself. Reading back through these posts remind me that my original goal was to make something that didn't just feel like a bunch of planks nailed together and this one hundered percent achieves that. For sure.
as I stained this over the course of two visits to the shed I spoke with D, a fellow shedgoer who I've mentioned before, about abberations and marks in the wood. D commented that people will pay a premium for pieces with these marks, as they make the piece look more worn or vintage. I agree about the tool marks on my shelf providing value, but not for financial reasons. Every mark and scratch the stain has caught and accentuated is proof of the time this piece spent in the shed. Proof of every time I moved it from its tucked away corner and onto the bench to reassemble it for the umpteenth time. These marks tell the story of the table it was built on, and the tools used to build it. They're marks of the very human hands that helped assemble it. And knowing that. Feeling that every time I use it. Now that is vale to me...
Now onto the next one!
Woodworking on Furniture - Assembly and Staining (aka fuck routers) - 20250611
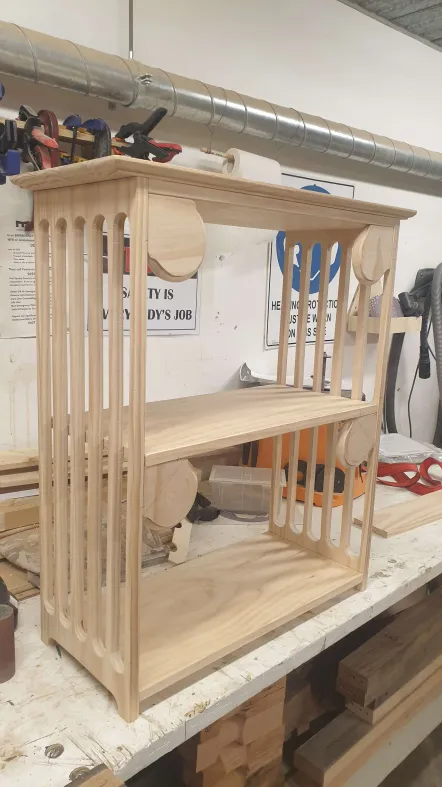
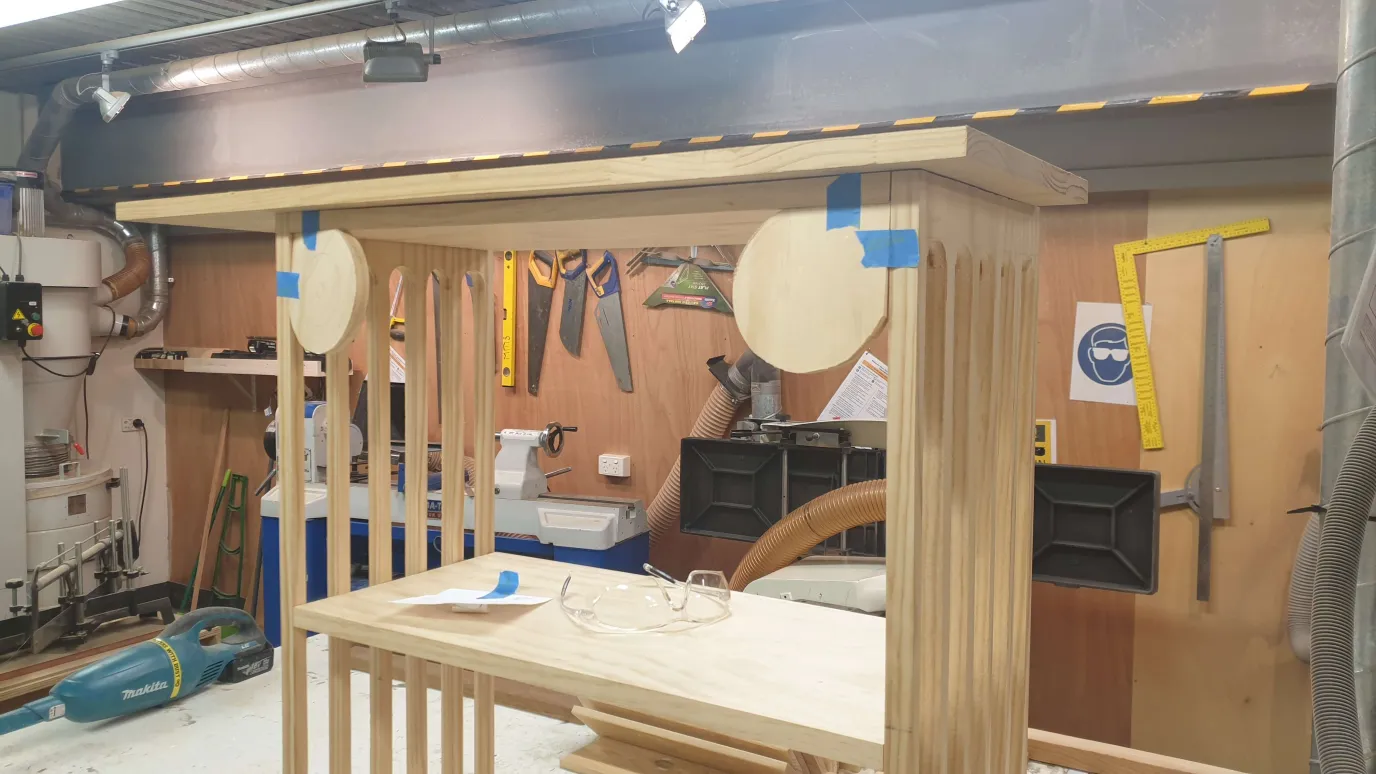
My time has been split between this piece and a plywood piano facade for a stage production I have been working on. But I finally finished that off and I returned to these shelves. I finished routing the corner pieces and sanded EVERYTHING by hand. I really wanted to be careful with the edges and corners and I feel like using a dremel would have created too hard an edge. So like three hours of hand sanding it was. After that I assembled the piece just to see if I was happy about the look, which you can see here:
And I stained everything to the right colour, which looks like warm honey and I love it.
I might be putting a second coat on the shelves to get them a little bit darker, but I am really happy with the colour of the sides.
I've been having a very good time working on this. Its been a good experience in working with detail and the router, as much as I hate that thing, and has been a great exploration into the aesthetics of furniture. I'll post a picture when its all sorted. And then onto the next project!!
Woodworking on Furniture - Shelf Supports - 20250403
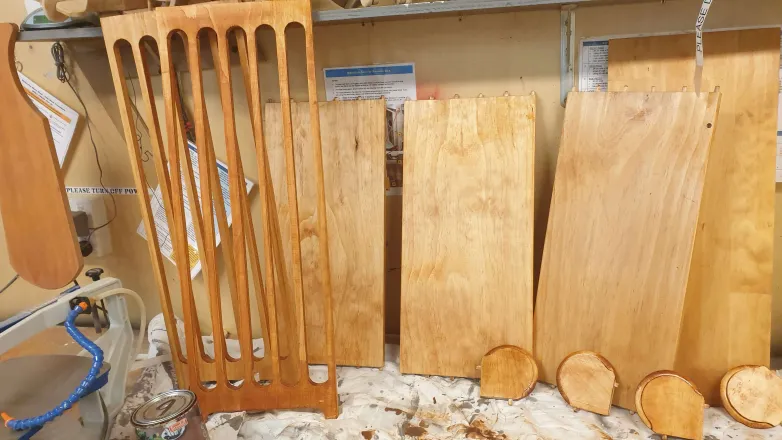
Check these out! I originally had a more generic shape in mind (a quarter circle with a few square additions), but after speaking with another woodworker, L, at the shed (L is a proper artist, like entering into popup galleries proper) we settled on this shape. A sort of tear drop glue bead to be in conversation with the curves of the cutouts on the sides. You can also see the board on top there, which I'm still deciding if I'm going to make a recess into so it fits snugly over the shelf, or if I'm just going to stick it on top.
Another conversation with a different shedgoer, D, revealed that whilst those glue bead corner stabilisers look pretty, they won't do a whole lot in stabilising the frame. Maybe, maybe. I reckon if they're tight enough then they'll hold, but I'm also inclined to listen to D, who's been doing this for 40 years now. We figured that some larger braces at the back would do hold it steady. Which unfortunately gets in the way of me making this without a back, and having it be reversible. But if I don't have that feature its a small price to pay for stability and longevity. Now I'm thinking about it, if its gonna have a back, why not go the whole way and place a wide sheet of MDF or something back there? But again, longevity. We want to be able to repair it easily, and that might not cut it.
Whilst this is certainly taking longer than I wanted it to, I think my effort and attention to detail are really showing through. L described the design as 'elegant', and that is high praise coming from a veteran. L also echoes a similar sentiment that my dad spoke to me about in a recent discussion. That you get more reliable at making as time goes on. As much as I am not looking forward to being forty and creaky and tired and worn out, I am looking forward to the day when I am more reliable at this craft. But in the meantime I'll continue, and enjoy the process.
Woodworking on Furniture - Part 2, a Desk finished, a Shelf started - 20250306
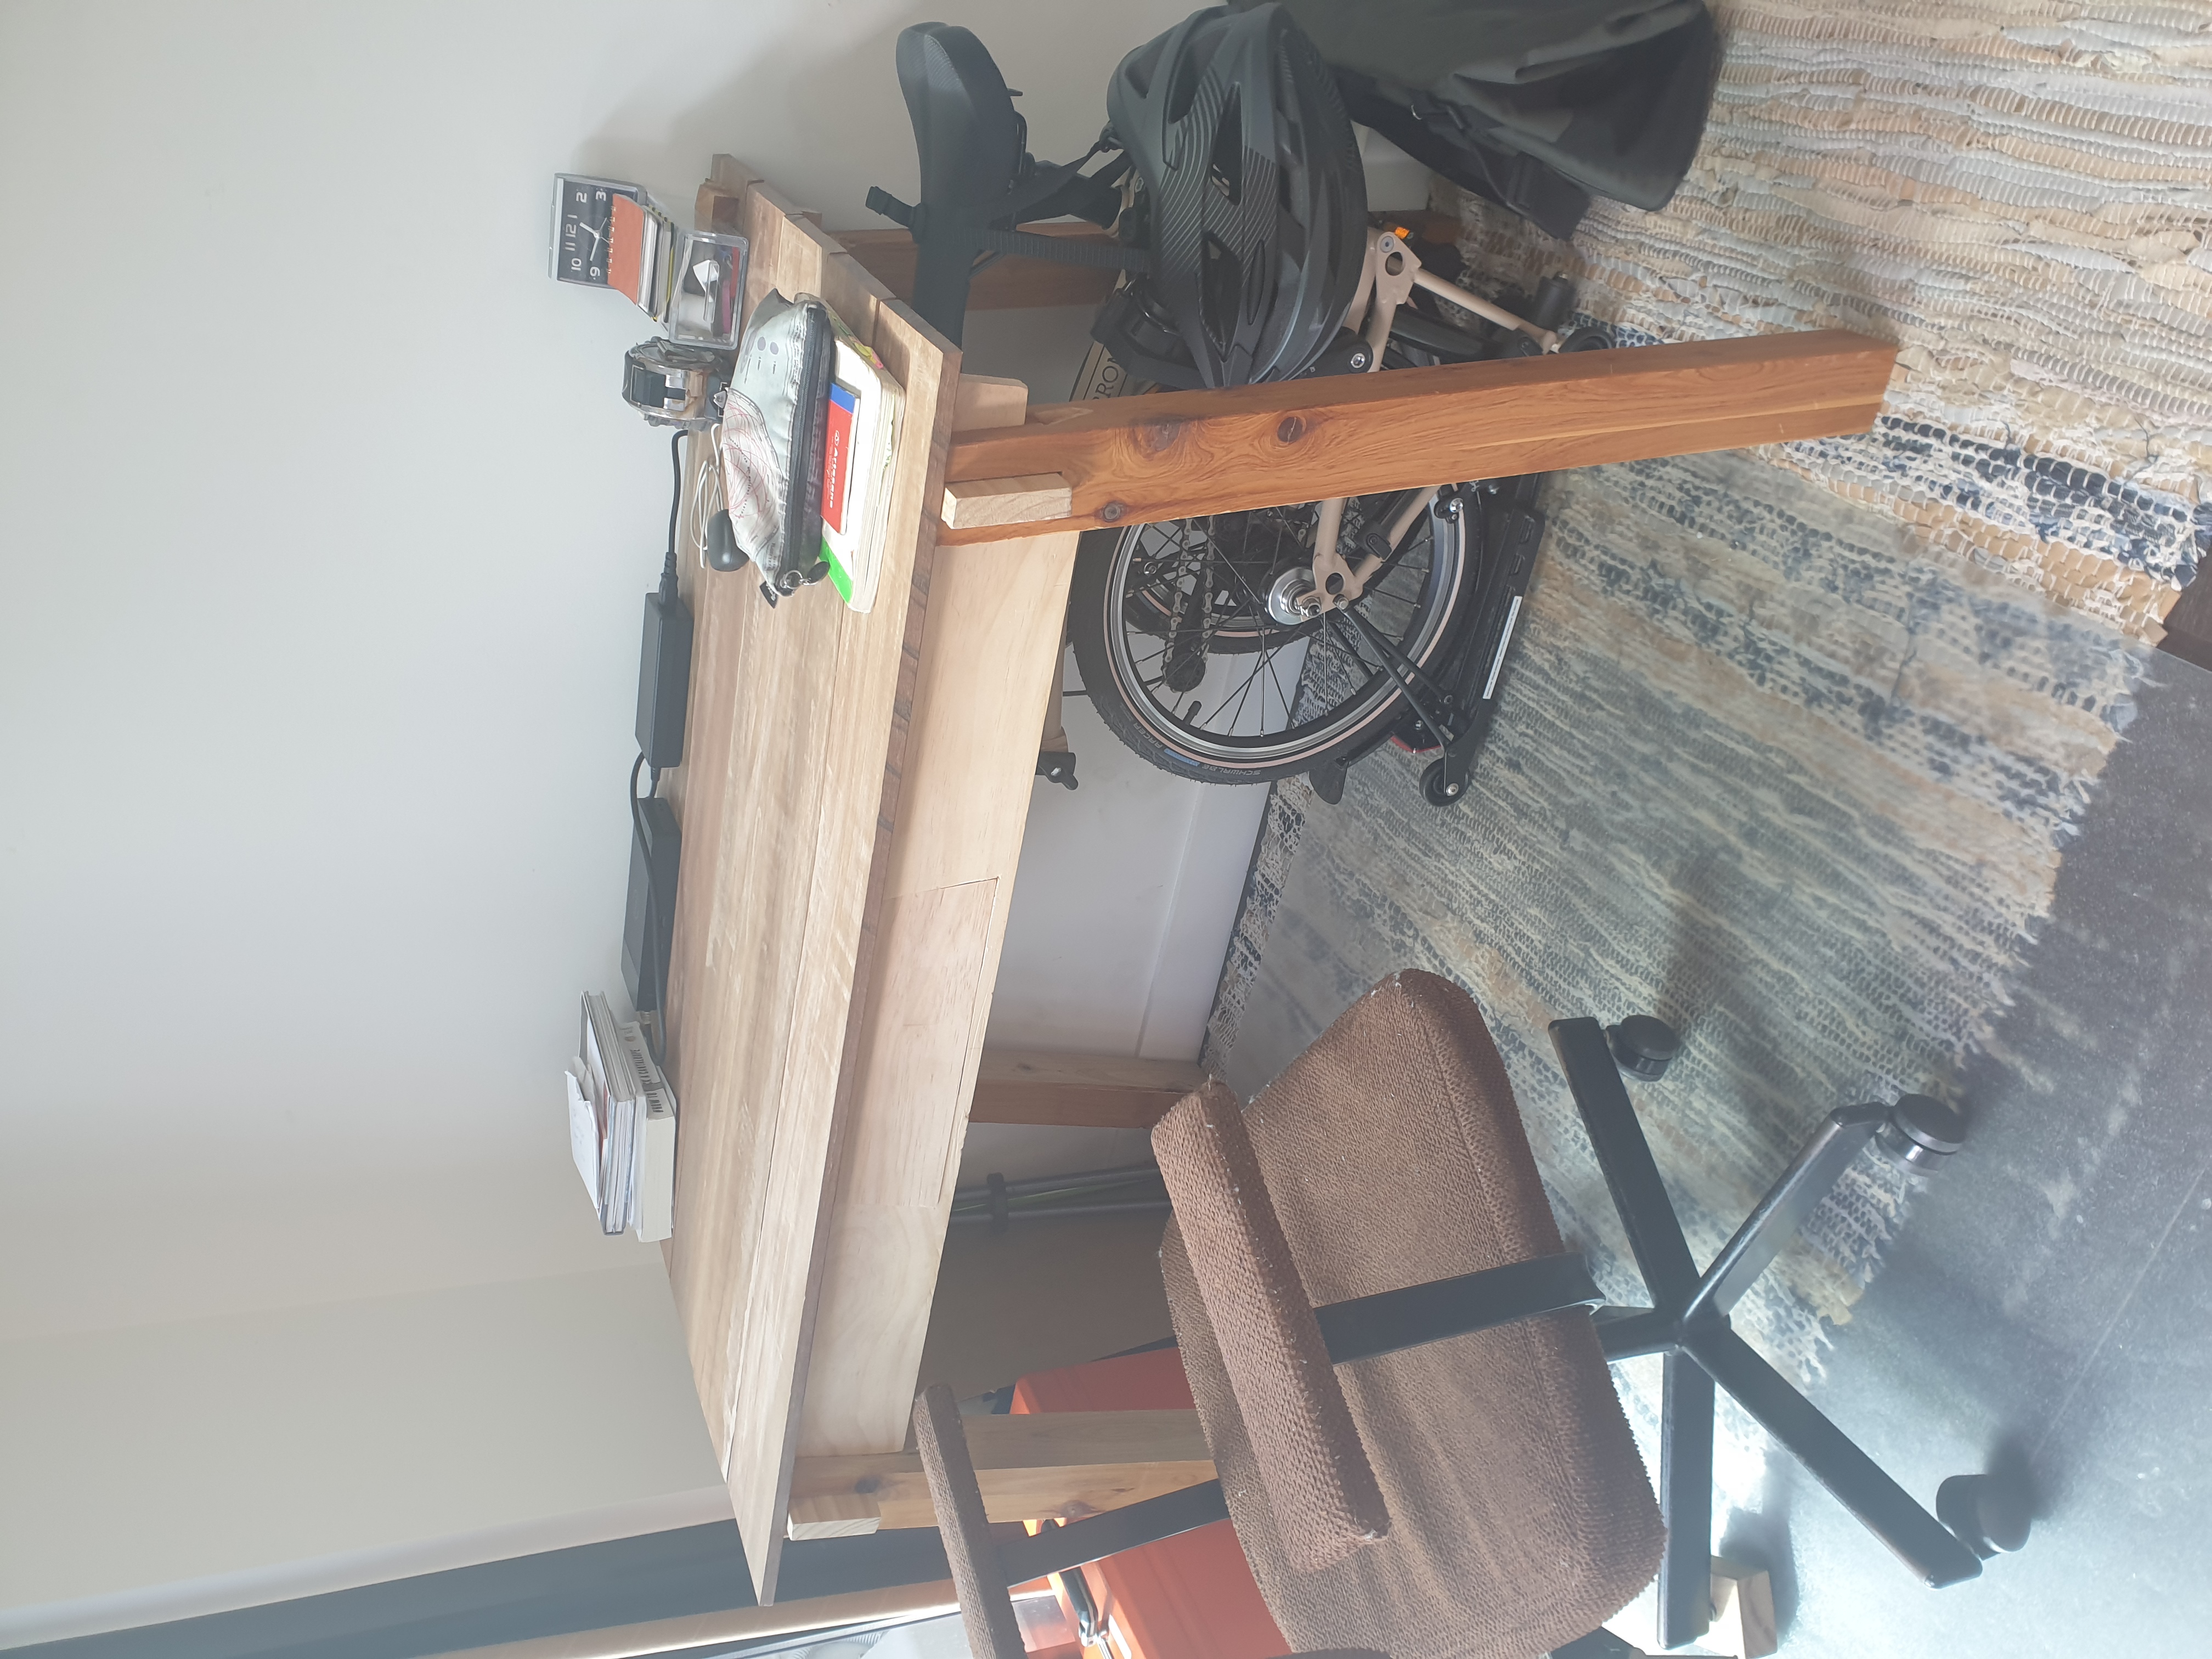
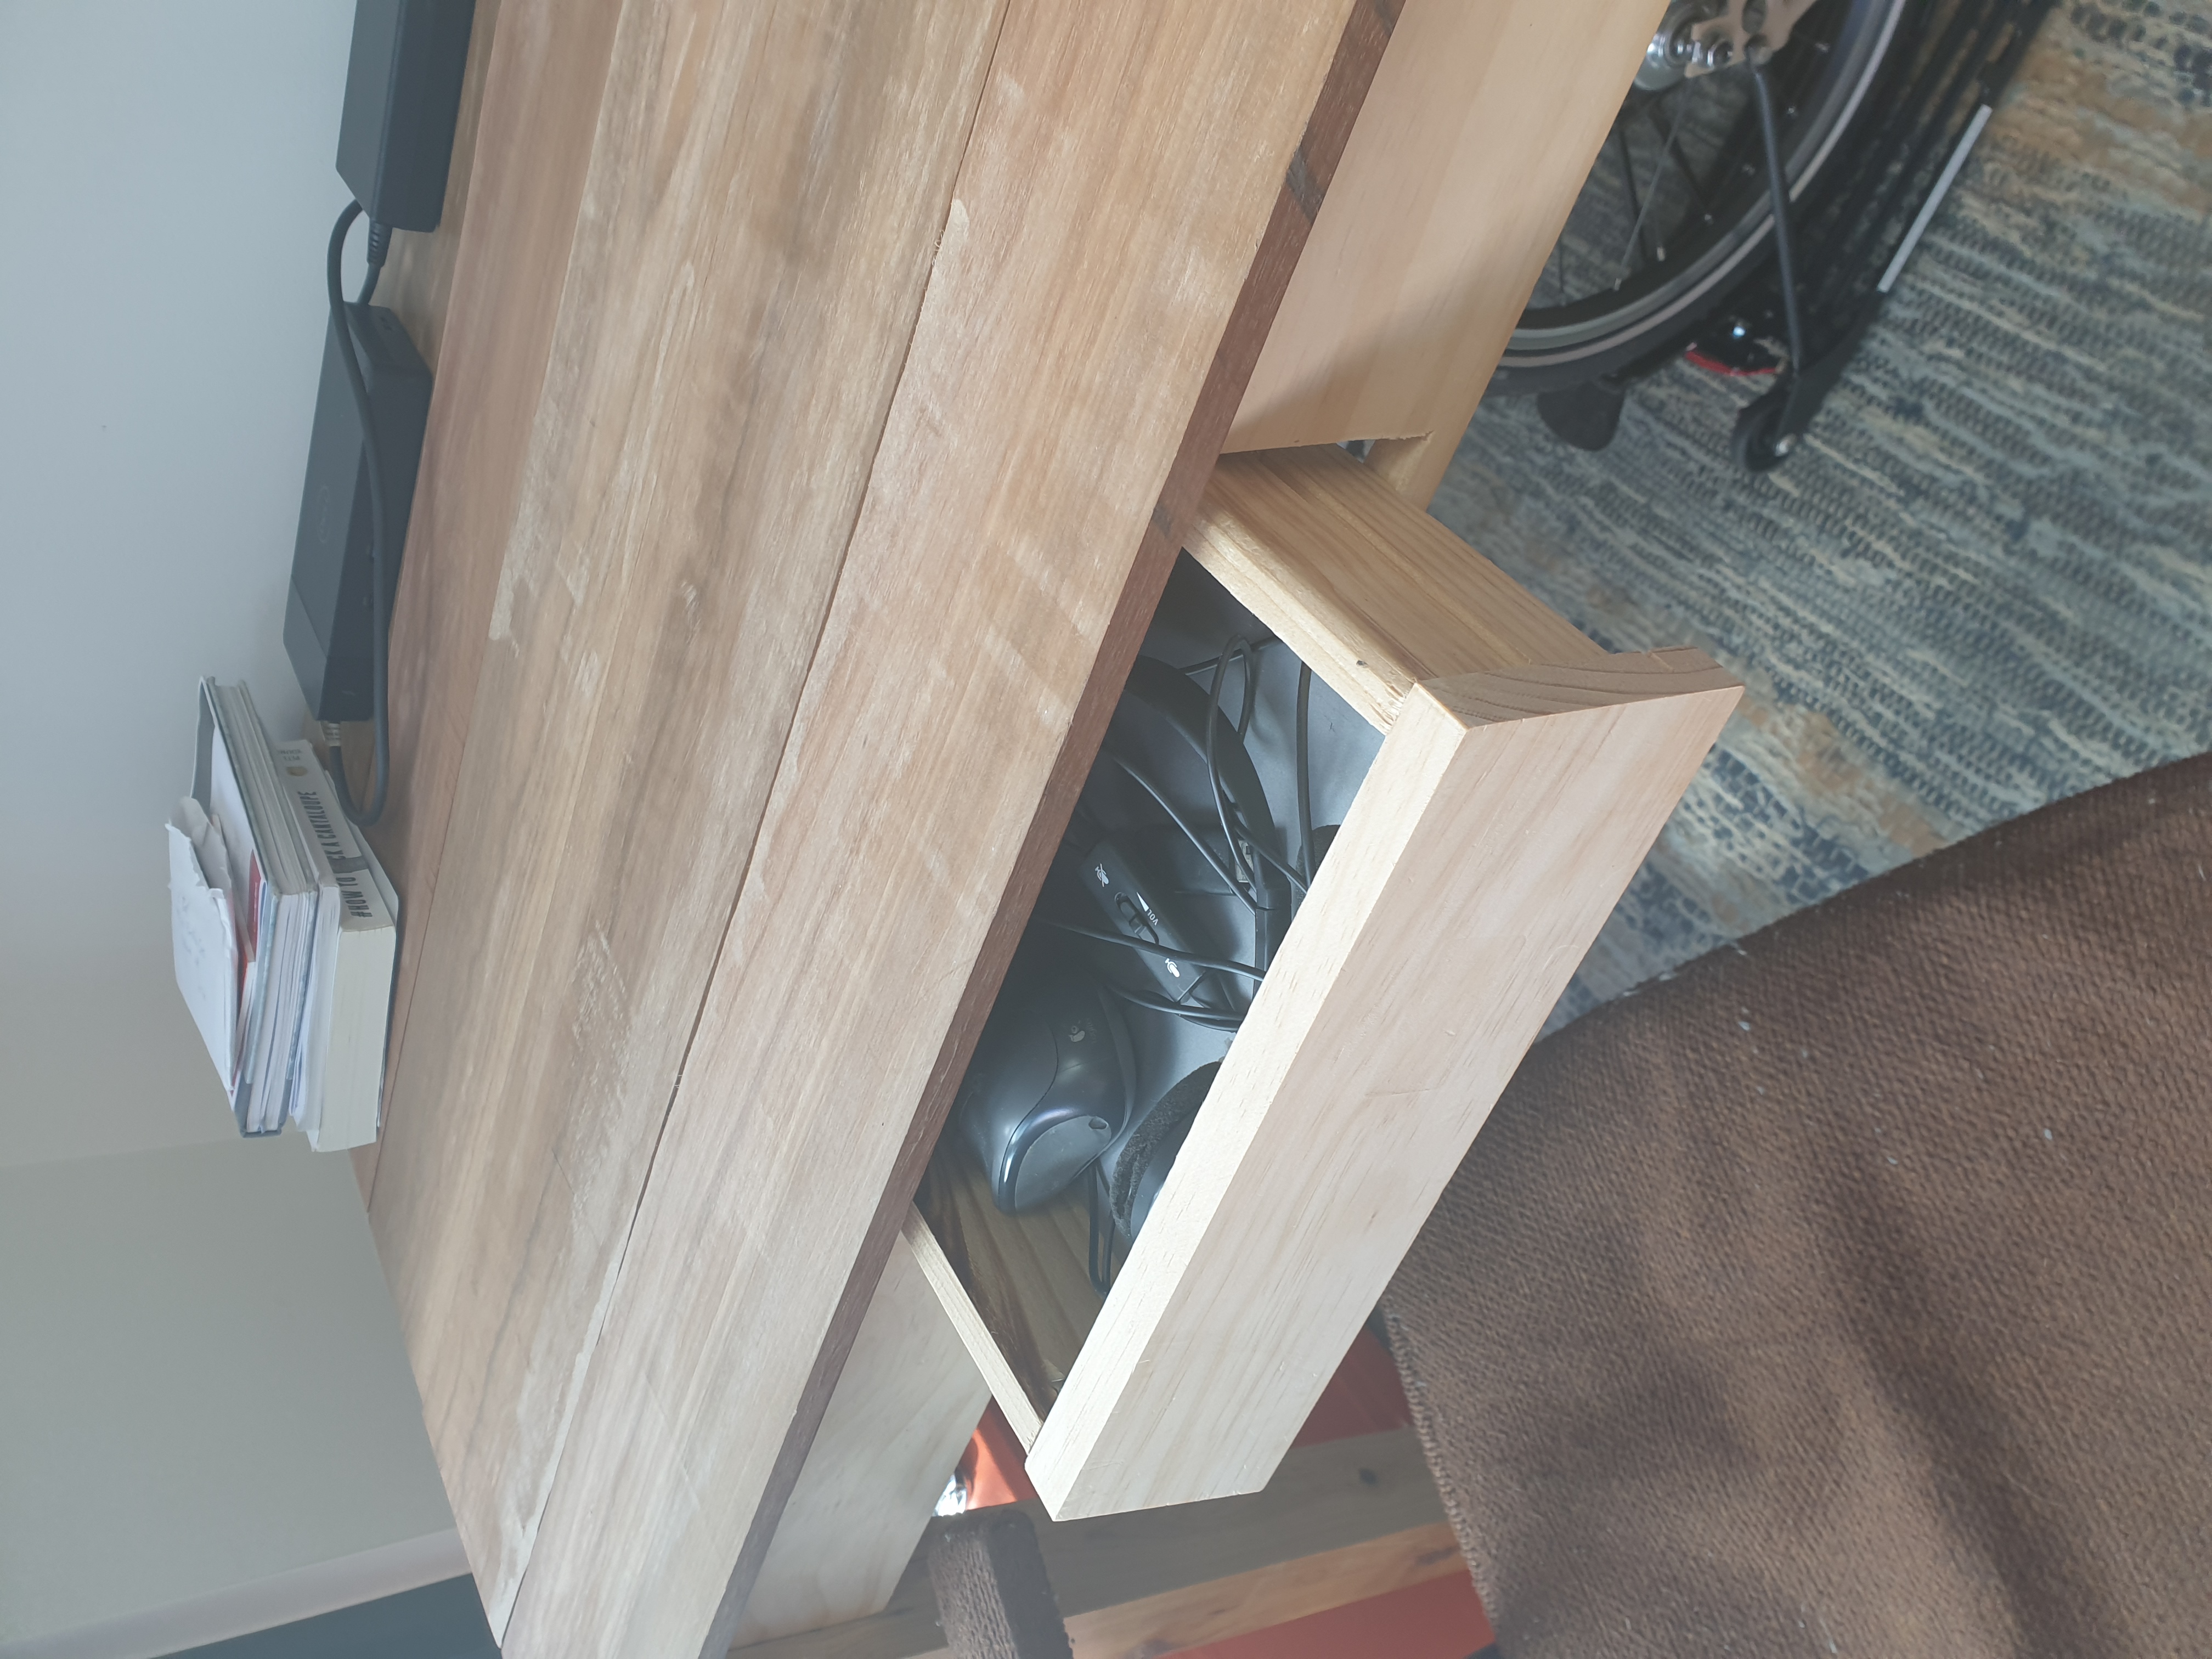
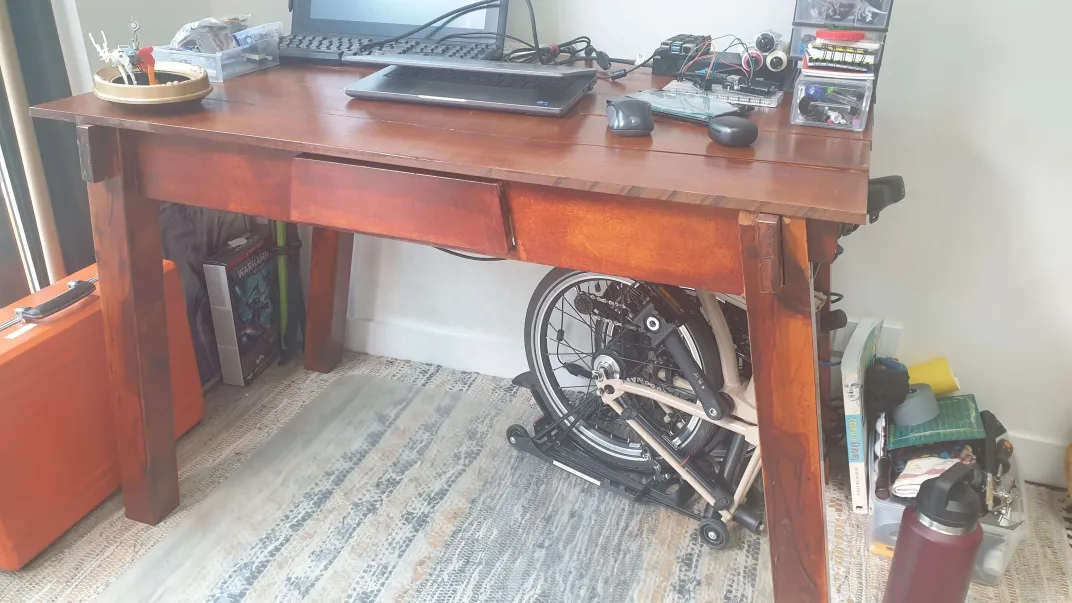
and there you have it, the finished and stained table! yes I'll be the first to admit it isn't the greatest finishing work. turns out its pretty goddman hard to run an even coat, and even harder to avoid dripping. I would have been well advised to ask someone more experienced, or watch a tutorial, but I did rush a little bit. don't worry I'm paying for that now, turns out whatever sealer in the stain was nowhere near enough, and around where my hands and arms rest there is a lot flaking off in bumpy ways. I do plan on sealing it all properly... eventually. its just that this desk is my main workspace right now, if I were to start messing around with it then I basically don't have a desk for as long as it takes to dry. so I'll deal with it for now. but it will be fixed eventually!
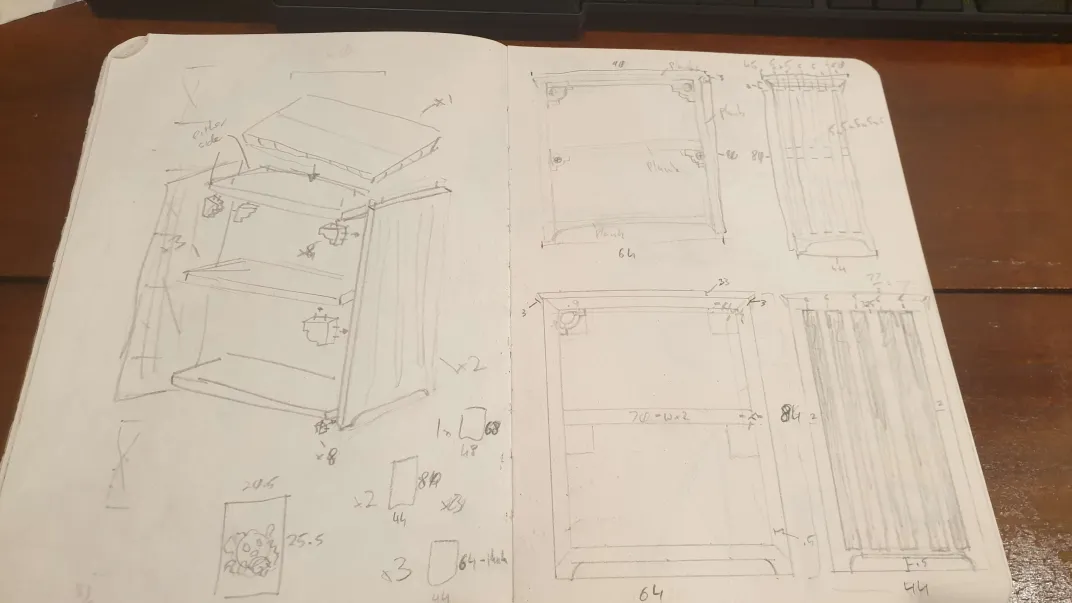
but onwards and upwards! there is no time to waste when it comes to the next piece of furniture. for this next one, I need a standing shelf type unit for inside my wardrobe. and the general idea I came up with is
a big focus of this piece is the decorative parts, and the attention to detail around the edges and corners. I'm sick of making furniture that just looks like bits of wood nailed together, I want to make functional pieces of art taht stand the test of time both aesthetically and intact. a lofty goal maybe. but as me, I'm comprised of lofty goals. I picked up some nice boards of pine from the local hardware store (which were not cheap!) and got to work. I wanted to begin on the hardest and what I saw to be the most challenging part (outside of all the finishing I plan on doing) first, and so began work on those holed out sides. I actually found myself liking the rounded rectangles, as opposed to them being entirely square, and even found that one slit and eight holes looked really good too! I sketched that look down for another time. I also added some subtle cuts from the bottom of the piece to form legs, and the moment I added those, suddenly the whole thing started to look like a piece of funriture and not just mutilated lumber. its details like that I really want to hone in on. with just a few square centimeters of material removed, a rectangle becomes furniture. brilliant.
here it is balanced on its side. I like the look of it a lot. I'll be adding a top to the thing which I'll show you next time, as well as those decorative corner pieces. I also won't be using screws for this piece, opting instead for dowel and wood glue. both for a cleaner look, and coming to the understanding that wood glue is not as cheaty as I first thought it was, and I reckon that it will hold for a long time (and if not, can be easily repaired). a lot of this first leg of the journey was extremely precise measuring, most of which I did well, but some I did not. but putting in these shelves is going to be just as difficult, but I welcome the challenge.
in my last visit to the mens shed, I was so focused on what I was doing and so into it, that time just melted away, and I kept looking up at the clock to realise it was getting later and later in the evening. at one point I left the shed and explained this to the bloke who was there, J, who said that "eventually, it stops being about speed, and starts being about perfection, no matter how long that takes". thats cool, I like that.
Woodworking on Furniture - Part 1, a Desk- 20250104
my partner and I agreed that we wouldn't buy a single piece of f
urniture for our new apartment. we would make all of it. and the
first thing I needed was a desk. the desk didn't need to be comp
licated. In fact the only feature it really needed was a drawer
to store my work computer when not in use, because having that t
hing out all the time frustrated the hell out of me (working in
tech and working from home makes you have weird preferences I kn
ow) and despite all the new and complicated furniture I'd have t
o build for this apartment, having a desk to draw up all those d
esigns seemed to be the best idea. And I'd made desks before. th
is should be easy, right?
well there were a few stipulations I had going into this project
. first and foremost among them was by way of transport. see whi
lst the workshop is close, it's still a good 20 minute bike ride
(or 10 by public transport) so I can't just build a whole desk a
nd take it on the tram. secondly, because I live in an apartment
, I don't really have any powertools at my disposal either. outs
ide of some hand tools and a dremel, there was no powered assemb
ly I could do at home. which meant that everything I did needed
to be both dissasemblable enough to be transported back and fort
h in a trolley, but also had to use as few nails and screws as p
ossible to make assembly at home easy.
what an interesting challenge!
--
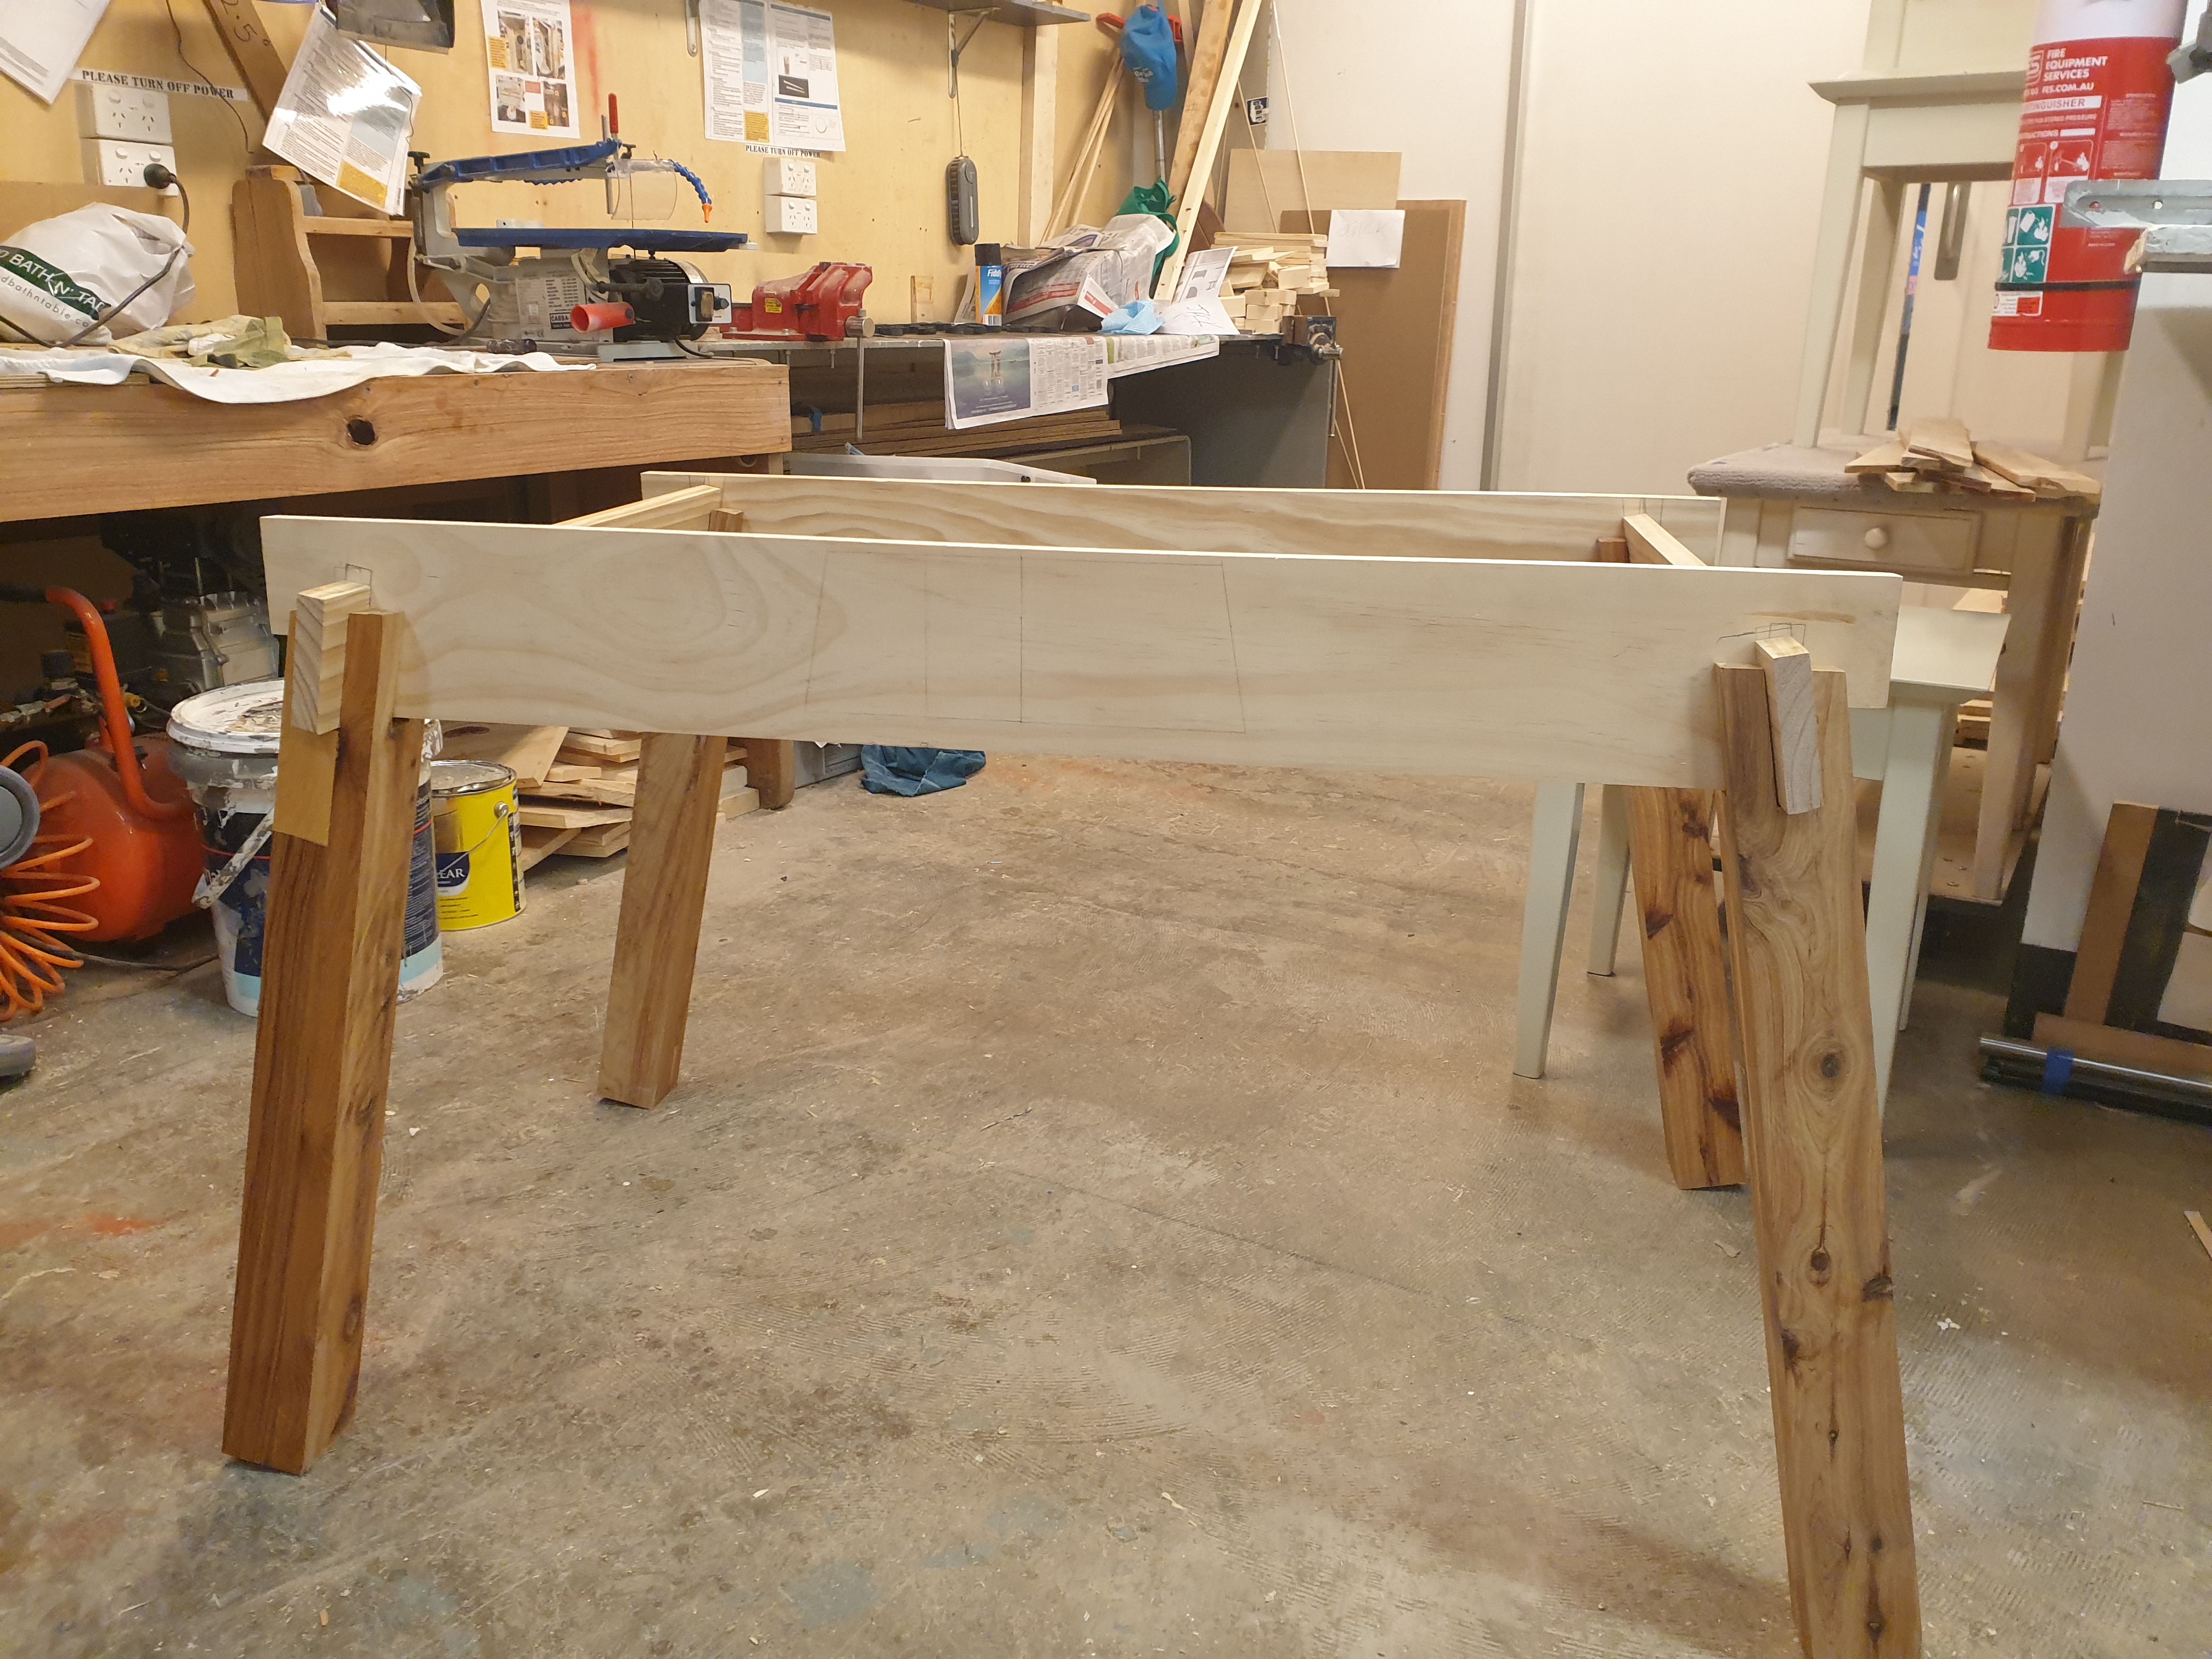
here is the first attempt at the frame. as you can see, a few co
mplications have arisen pretty quickly. the first being that the
technique I used to cut the leg joints is all fucked up. see, be
cause of how the leg is angled on my jig to make a s safe a cut
as possible, the saw itself is actually cutting at two different
depths. in addition, the planks of wood I bought for the apron o
f the desk are taller than the tablesaw is, meaning they poke ou
t the top!
none of this will do, and I set about fixing these issues one by
one. I find this with a lot of my projects, that I do all the pl
anning in the world and still end up having to improv solutions
to problems that arise. maybe someday I'll be so skilled that I
never have to improvise, and my planning skillz are so sick I ca
n construct furniture in my head on the fly. or maybe this is wh
at all creative work is like forever. knowing just enough to get
you into trouble, and then knowing just enough to get you out of
it again. I think I'm happy either way. so I went about solving
problems.
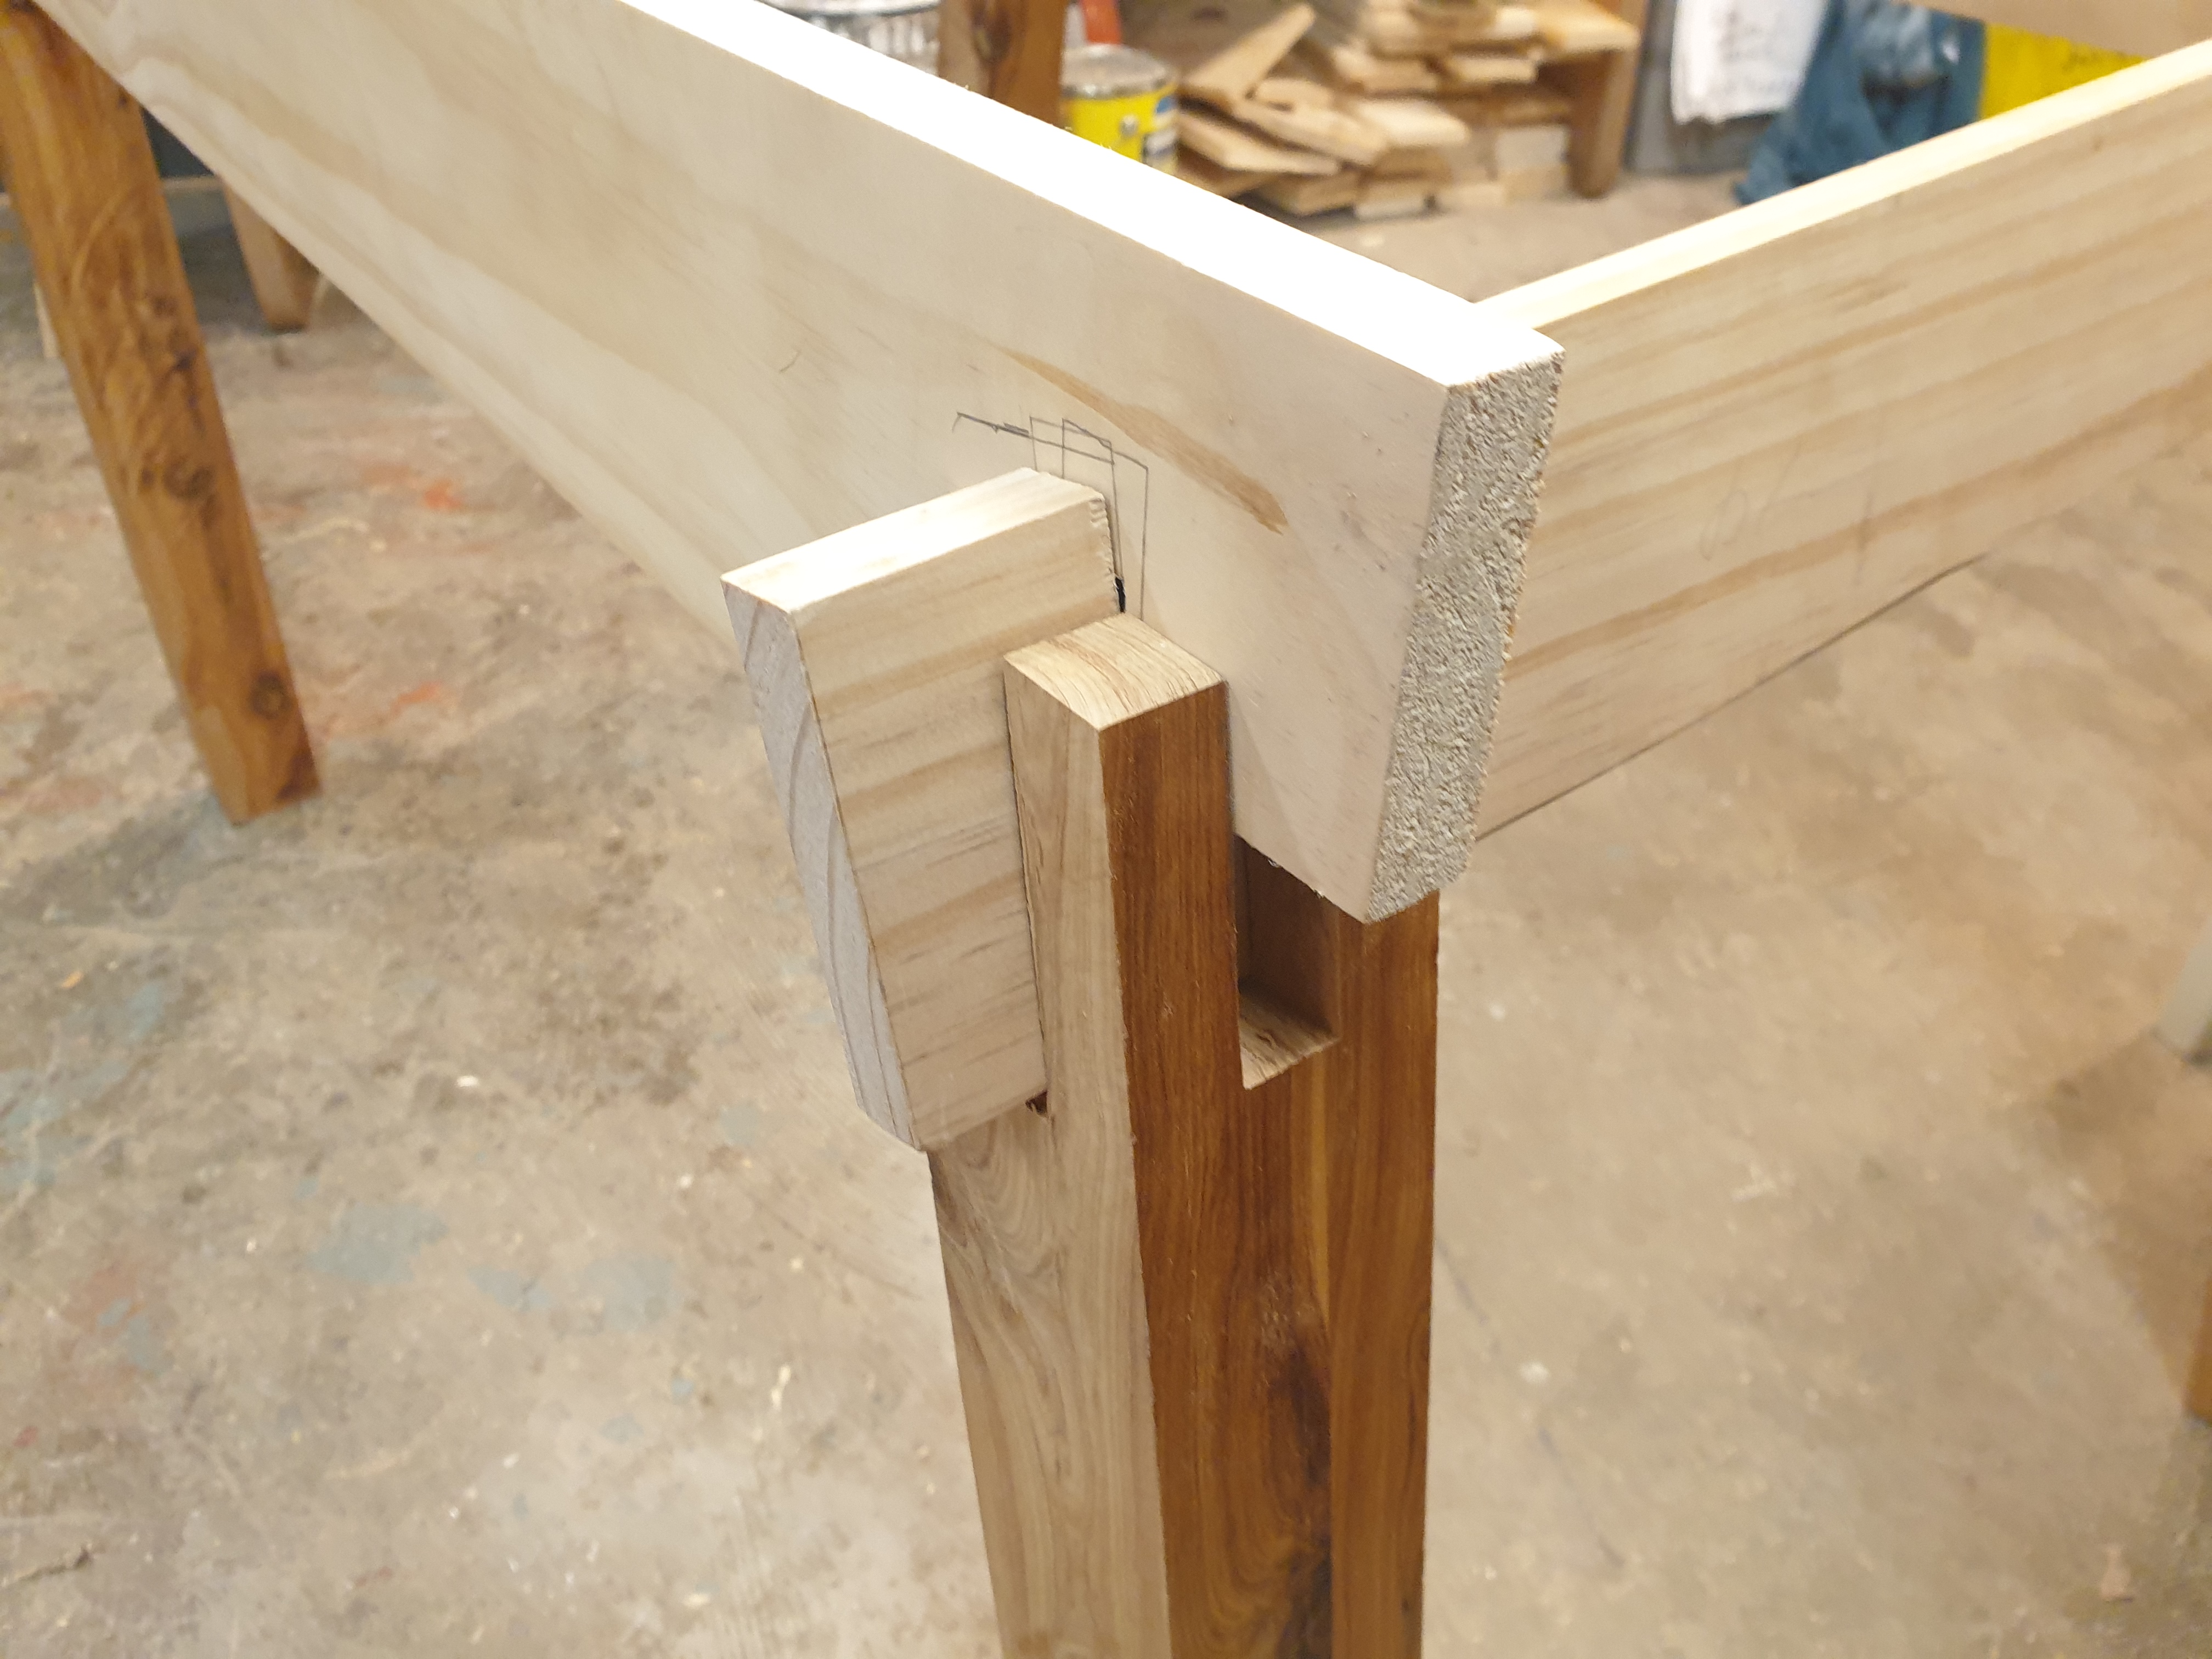
you may be asking yourself, hazard, why on earth is your intent
to add in all those angles, making this project HARDER on yourse
lf when you don't even have a desk to sit at yet. well, I'm was
determined not just to create a functional piece, but one with s
ome aesthetic intent. I chose these angles to give the desk a gr
ounded appearance. like a mountain or a temple. this was to be m
y work or office desk, and thus I wanted that strength to be at
the core of its design. this was a place to put in effort, not a
place to lounge. 10 degrees was chosen mostly as something easy
to remember, as well as being small enough to not make the desks
square footage too large, but also keeping the angle big enough
to be noticable.
--
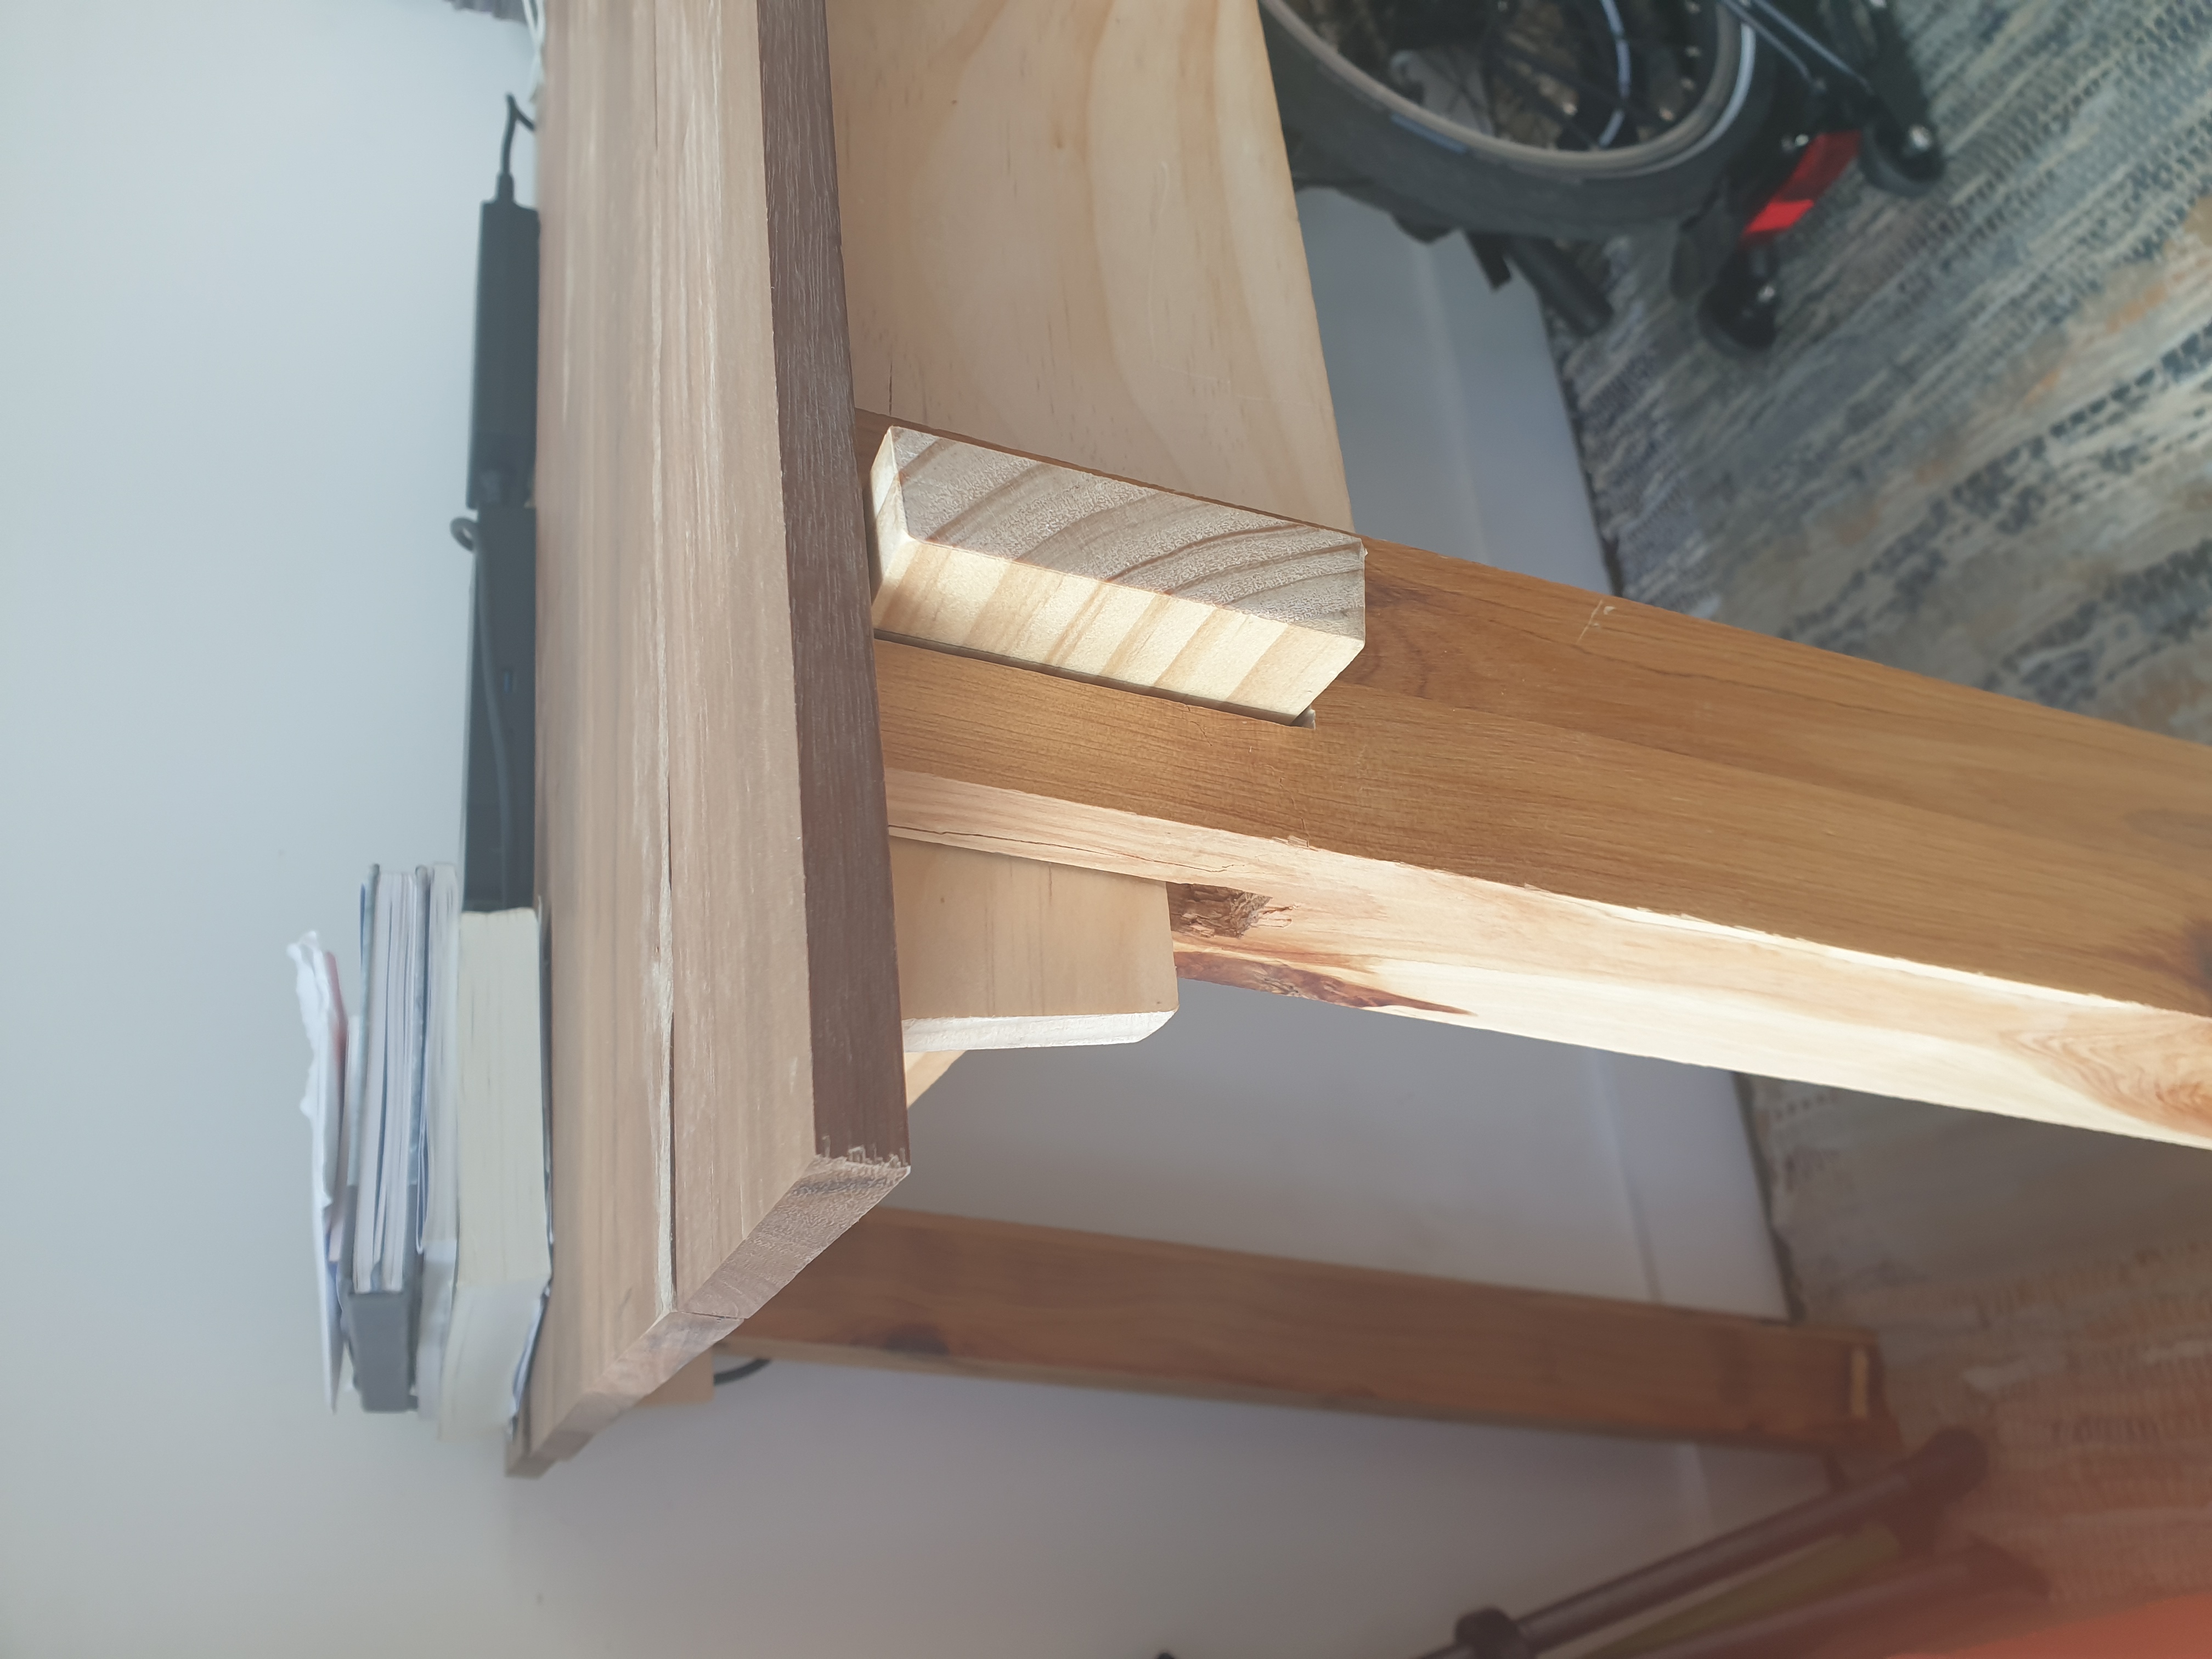
here's the almost finished product, sans the stain and varnish I
've got to coat it in. once that's done we'll talk about the pro
ject a bit more.

 a big focus of this piece is the decorative parts, and the attention to detail around the edges and corners. I'm sick of making furniture that just looks like bits of wood nailed together, I want to make functional pieces of art taht stand the test of time both aesthetically and intact. a lofty goal maybe. but as me, I'm comprised of lofty goals. I picked up some nice boards of pine from the local hardware store (which were not cheap!) and got to work. I wanted to begin on the hardest and what I saw to be the most challenging part (outside of all the finishing I plan on doing) first, and so began work on those holed out sides. I actually found myself liking the rounded rectangles, as opposed to them being entirely square, and even found that one slit and eight holes looked really good too! I sketched that look down for another time. I also added some subtle cuts from the bottom of the piece to form legs, and the moment I added those, suddenly the whole thing started to look like a piece of funriture and not just mutilated lumber. its details like that I really want to hone in on. with just a few square centimeters of material removed, a rectangle becomes furniture. brilliant.